Cisco ASA clientless Remote Access VPN
Cisco Remote access Clientless VPN is way of access remote resources without the help of vpn client. You can browse through internal URL’s/FTP resources etc. Additional functions like remote desktop etc can be added via plugins. We will discuss about it later.
The first step to enable remote access clientless vpn is to enable it on the interface. Normally it is outside interface of ASA.
ciscoasa(config)# webvpn
ciscoasa(config-webvpn)# enable outside
Next Step is to create an user. Lets create a user called sam
ciscoasa(config)#username sam password cisco
IP address of outside interface is 10.0.0.1, so lets try to open same ip address in web Browser. In the browser addressbar type http://10.0.0.1. You will notice that browser will not able to display the login page. This is because by default SSL webvpn uses port 443. To login to that page we have to use https://10.0.0.1.
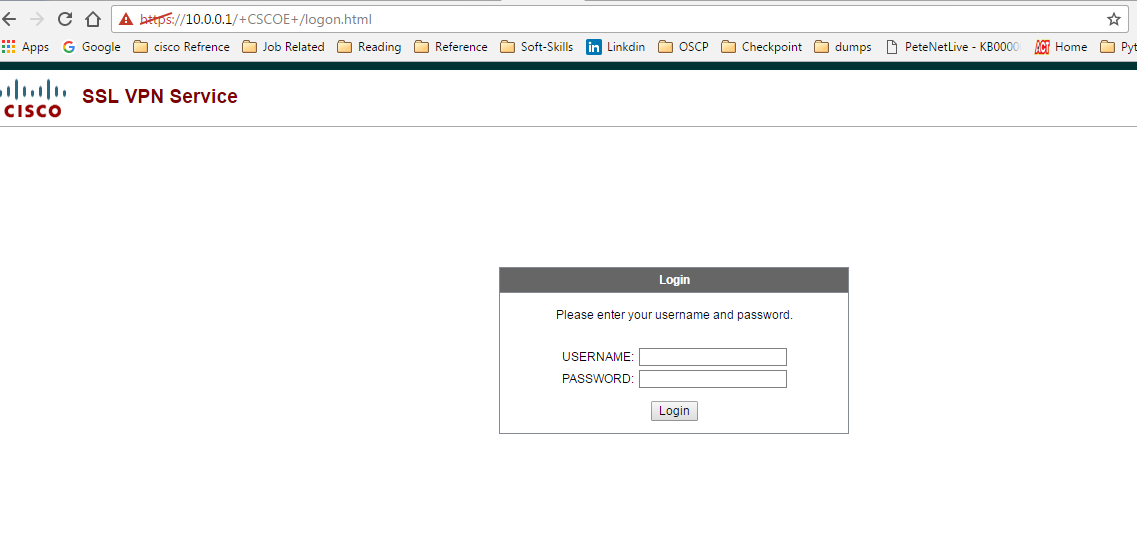
To overcome this inconvenience there is a method.
ciscoasa(config)# http redirect outside 80
Now all the connection going towards port 80 will be redirected towards 443.
Once you login you will get following screen.
As you can see we have address bar from which you can reach internal URL/FTP servers etc and options for file browsing. This is a basic demo of clientless vpn or webvpn.
To create a webvpn we need three factors
It is convenient to configure these in above given order since group policy is called inside connection profile and then connection profile is called in when defining user attributes.
Here in the case of sam we didn’t defined any policy or tunnel group. Hence default connection profile and tunnel group were used. These can viewed in cli using following command:
ciscoasa# sh run all group-policy
Name of Default group policy is DfltGrpPolicy
Under default group policy there is sub section called webvpn where web vpn attributed are defined.
Similar is the case with tunnel group, use following command to see default tunnel group :
ciscoasa# sh run all tunnel-group
The default tunnel group name is DefaultWEBVPNGroup
Lets create a new group policy and tunnel group and change attributes according to our need.
Group Policy name : hr_policy
Tunnel Group : hr_tunnel
User : hr_user
Group Policy
ciscoasa(config)# group-policy hr_policy internal
There are various parameters under group policy that can be changed. if you do not explicitly define a parameter, the group takes the value from the default group policy.
By default a group policy uses IPsec only, but we need it to use SSL because webvpn uses SSL.
ciscoasa(config)# group-policy hr_policy attributes
ciscoasa(config-group-policy)# vpn-tunnel-protocol ssl-clientless
if you want to use same group policy for oter vpn connections such as any connect etc you can use those along with ‘ssl-clientless’ in the same line.
Ex: vpn-tunnel-protocol ssl-clientless ssl-client l2tp-ipsec
Under group policy now we have specify its webvpn parameters because its those attributes which comes into play when we use this group policy for webvpn :
ciscoasa(config-group-policy)# webvpn
ciscoasa(config-group-webvpn)
As you can see there many attributes of webvpn that can be changed. For time being we are going keep this part untouched, so that those attributes will be same as of default policy.
Tunnel Group
Here lets create a tunnel group :
ciscoasa(config)# tunnel-group hr_tunnel type remote-access
ciscoasa(config)# tunnel-group hr_tunnel webvpn-attributes
As you can see in the above picture for webvpn any pre-login config changes are done either under ‘general-attributes’ or ‘webvpn-attributes’. Lets associate group policy ‘hr_policy’ to this tunnel group. This have to be done under general attributes :
ciscoasa(config)# tunnel-group hr_tunnel general-attributes
ciscoasa(config-tunnel-general)# default-group-policy hr_policy
Now lets go to webvpn attribute of tunnel group and define what type of authentication it can use. Here we are allowing aaa.
ciscoasa(config-tunnel-webvpn)# authentication aaa
User
The third step is to create a user
ciscoasa(config)# username hr_user password cisco
ciscoasa(config)# username hr_user attributes
ciscoasa(config-username)# service-type remote-access
ciscoasa(config-username)# group-lock value hr_tunnel
Once we defined user and password we have define user’s attributes. Two most important ones are given above.
First one is service type : this defines what type of user it is. ‘Remote access user’ is only allowed for remote access connectivity not adsm access.
Group-lock-value associates user with a specific tunnel group.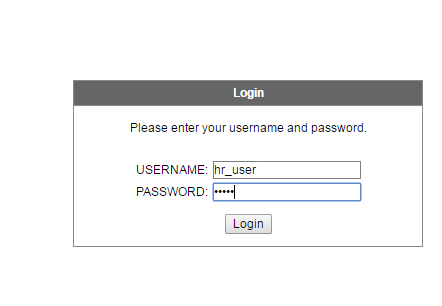
Done! Webvpn with custom group policy and tunnel group has been configured. Note that most of the attributes in the these tunnel group and group policy are from default. We will make changes according to our requirement .
But first lets test it.
Login Failed!!
Reason here is ASA is trying to login hr_user using its default tunnel group. But it will not work because we have used a tunnel group lock for hr_user to associate it to hr_tunnel. So we have to make hr_user to login to hr_tunnel.
Remember this is pre-login action so config changes are to be done in tunnel group settings.
Go to global webvpn settings and enable option for tunnel group selection:
ciscoasa(config)# webvpn
ciscoasa(config-webvpn)# tunnel-group-list enable
Now go to tunnel group :
ciscoasa(config)#tunnel-group hr_tunnel webvpn-attributes
ciscoasa(config-tunnel-webvpn)# group-alias HR enable
IF you reload login page now you should get a Drop down as shown on your right. Use the username and password we created to login. 

As you can see this is the homepage of SSL VPN service.
Let's modify each of home page Aspects starting with ‘Home’ tab. In home tab we have address bar using which we can go to required url. If you click on drop down you can see options to through ftp and CIFS etc.
Task 1 : Disable https/http browsing:
 Note : This is post login feature hence all config changes should be done in group policy.
Go to Group policy > webvpn >
ciscoasa(config)# group-policy hr_policy attributes
ciscoasa(config-group-policy)# webvpn
ciscoasa(config-group-webvpn)# url-entry disable
Now login again to page and click on the drop down.
Its removed.
Task 2 : disable the feature to enter file server name to access
Same way lets disable the feature to enter file server name to access.
ciscoasa(config-group-webvpn)# file-entry disable

As you can see the entire address bar is removed. Now let's click on ‘browse network’ tab on URL .
Here you can see a link called ‘browse entire network’ this enables user to browse network file system. Lets disable this.
Task 3: Remove file browsing
ciscoasa(config-group-webvpn)# file-browsing disable
When you re-login this hyperlink will be removed.
Task 4 : Plugin installation for remote Desktop
This part is easy to do via ASDM. Go to following section in ASDM.
Click on ‘Import Plugin’
This will pop a windows where you can select type of plugin you are importing and pat to plugin.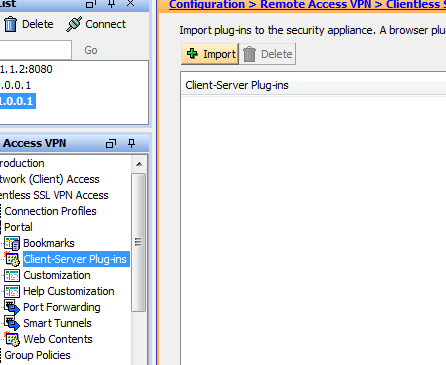
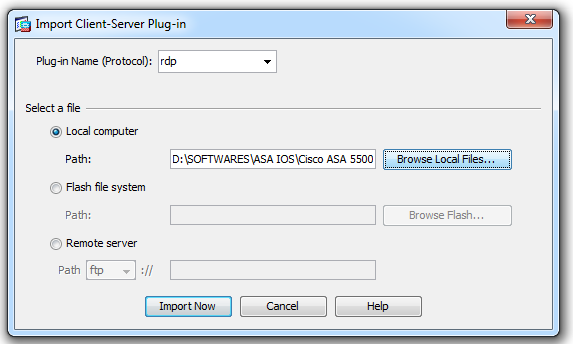
After that click import. Once imported it will show up in list of plugins. Since we have disabled URL browsing we cannot give the IP address of required PC and access it via RDP. So we need to create a bookmark. Here we are going to create bookmark for group policy ‘hr_policy’.
Open hr_policy>portal. In ‘Bookmark list’ click on ‘manage ‘.this will give options to define a bookmark list and a bookmark inside that.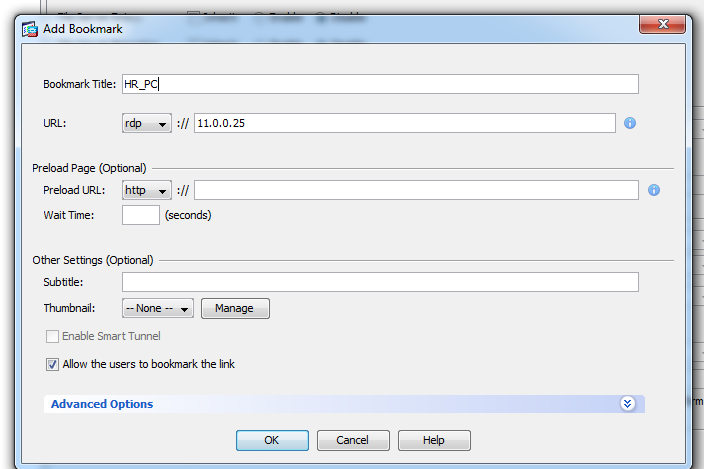
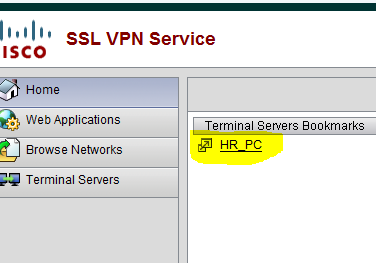
Once Done login to SSL Portal using hr_user credential, you will a bookmark we created. Click on that to start a RDP session to the PC inside.
Task 5 : Banner Message hr_user after login
To Create a banner message go to ‘group policies’, open ‘hr_policy’. You will see banner section of ‘hr_policy’ is inherited from default group policy. Uncheck inherited policy and give your custom policy. Next time when you login you will receive a banner message.
Show commands:
Show vpn-sessiondb summary → to see session summary
Show vpn-sessiondb detail → Deatil view
vpn-sessiondb logoff <parameter> → to logoff required vpn